If you love photography, you know that keeping your gear clean is crucial for ensuring optimal performance and extending its lifespan. Dust, smudges, and grime can compromise image quality and lead to costly repairs.
This guide covers the essential tools and materials needed for effective cleaning and provides a step-by-step approach to maintaining lenses, camera bodies, filters, and accessories. Additionally, discover tips and best practices to prevent dirt buildup in the first place.

Why Proper Cleaning is Important for Photography Gear
Properly cleaning your photography kit is crucial for keeping your equipment looking sharp, performing at its best, and lasting a long time.
When you invest in quality kits like camera lenses, filters, and accessories, you want to keep them pristine. Dust, smudges, and grime can interfere with image quality and optical performance.
Regular cleaning helps avoid issues like lens fogging, residue build-up, and even damage to sensitive parts like the camera sensor. By adhering to a solid cleaning routine and using safe cleaning methods, your photography equipment will remain in top condition for years.
Prolonging the Lifespan of Equipment
To extend the life of your photography equipment, it’s crucial to adopt consistent care practices, such as using the right cleaning techniques and products.
Using specific tools, such as microfibre cloths, can help you wipe away dust and smudges without scratching delicate surfaces. Pair those cloths with high-quality lens cleaning solutions, and you’ll keep your equipment in top condition. Don’t forget about protective gear—items such as padded bags and lens caps act as a barrier against accidental damage.
By setting up a regular maintenance routine and incorporating these preventative measures, you can significantly reduce the risk of costly repairs, ensuring that your investment delivers fantastic results for years.
Tools and Materials for Cleaning
Having the right tools and materials on hand is essential for cleaning your photography equipment efficiently. This will ensure that everything is performing at its best.
Essential Items for Proper Cleaning
Having a well-stocked cleaning kit can really help you properly clean your photography equipment. It ensures you’re ready for anything, whether an unexpected outdoor shoot or routine maintenance at home.
Your essential kit should include specific items tailored for different cleaning tasks to keep your equipment performing at its best and lasting longer. For example, lens caps are a must—not just for protection but also to keep dust from settling on delicate glass surfaces.
Cleaning brushes are fantastic for gently whisking away dirt and debris that could scratch your lenses. Air blowers are perfect for dislodging stubborn particles from those tricky spots without direct contact. Microfibre cloths? They’re absolute game-changers—they soak up moisture and wipe away fingerprints, leaving surfaces pristine without scratching them.
Gathering all these items creates a solid cleaning system that maximises your equipment’s performance and enhances your overall photography experience.
Step-by-Step Guide for Cleaning Lenses
Cleaning your lenses correctly is crucial for maintaining their optical performance in peak conditions. You want your images to be crystal clear, without any annoying distractions like dust and smudges getting in the way.
Preparation and Techniques
Before you start the cleaning process, prepare yourself to ensure that everything goes smoothly and safely, protecting the precious lens surface from damage.
Start by inspecting the lens for grime, dust, or smudges. Then, grab a soft, dry microfibre cloth and gently wipe away any loose particles—this helps avoid scratches when you move on to deeper cleaning.
Depending on whether you’re dealing with a camera lens, spectacles, or binoculars, you might need different techniques to tackle the residue. A gentle lens cleaner solution works wonders for coated lenses, while non-coated surfaces probably need a damp cloth.
And here’s a golden rule: always apply the cleaning solution to the cloth instead of directly onto the lens. This ensures a thorough yet safe cleaning experience without any hiccups.
Cleaning Other Photography Gear
Cleaning your lenses is certainly important, but remember that your entire photography setup—camera bodies and accessories—requires regular maintenance, too.
Keeping everything in top-notch condition will help ensure you get the best performance from your equipment.
Camera Bodies, Filters, and Accessories
When cleaning your camera body and filters, using the right products and techniques can prevent issues like lens fogging and keep your gear in tip-top condition.
Start with a soft brush or blower to gently whisk away dust particles without scratching those delicate surfaces. For your camera body, isopropyl alcohol wipes are an excellent choice for disinfecting while protecting the paint finish. When it’s time to tackle your filters, grab a microfibre cloth and a gentle cleaning solution designed explicitly for optics to keep them crystal clear.
Remember to regularly check your gear for signs of wear and tear; maintaining it properly will help it last longer.
By making these practices a regular part of your routine, you’ll enhance your image quality and strengthen the bond between you and your cherished equipment.
Tips for Maintaining Clean Gear
To keep your photography equipment in tip-top condition, it’s essential to adopt a routine that focuses on how often you clean it and what preventative measures you can take. Doing this will help preserve your investments and keep everything looking and functioning well.
Preventive Measures and Best Practices
Implementing preventive measures and best practices for cleaning your equipment boosts its performance and significantly extends its lifespan.
Adopting simple strategies like using protective cases and lens caps can effectively minimise dust buildup and prevent scratches. These protective accessories are crucial for keeping your kit in tip-top condition. Regularly inspecting your equipment and gently cleaning it with microfibre cloths can help maintain clarity and functionality.
Making these practices part of your daily routine ensures your gear stays in excellent condition so you can capture stunning images without worrying about damaged equipment.
Investing time in care and maintenance pays off with tools that last longer and perform reliably throughout your photography journey.
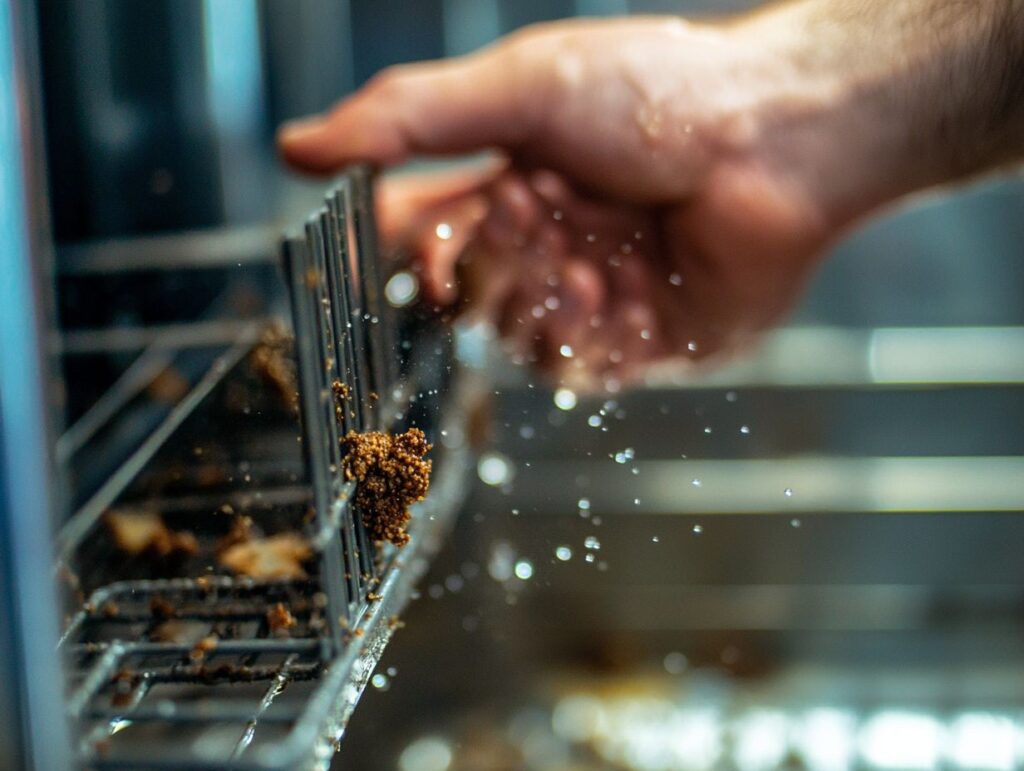
A well-functioning dishwasher is a vital part of any kitchen, but many overlook one key element: the dishwasher filter. Regular maintenance of this often-neglected component can prevent unpleasant odours, inefficient washing, and costly repairs.
This article explores why cleaning your dishwasher filter is essential, how to spot when it needs attention, and provides step-by-step instructions for a thorough clean. Additionally, we will share how to keep your dishwasher smelling fresh and running smoothly.
Ready to transform your dishwashing experience? Let’s get started!
The Importance of Cleaning a Dishwasher Filter
Cleaning your dishwasher filter ensures your appliance runs smoothly and remains hygienic. A clean filter keeps food particles, grease, and bacteria at bay, preventing unpleasant odours and sanitation issues.
If you regularly maintain your dishwasher filter, you’ll extend its lifespan and enhance its cleaning performance. You can avoid costly repairs and keep your kitchen smelling fresh by prioritising filter cleaning.
It’s an easy task that can pay off in your home cleaning routine and kitchen maintenance.
Why Regular Maintenance is Necessary
Regular maintenance is vital for your dishwasher because it directly impacts how well it operates and keeps your dishes clean. If you skip out on consistent care, parts like the filter can become clogged with food particles and grease, leading to unpleasant odours and less effective washing cycles.
Ignoring this maintenance can create safety risks, as bacteria and mould thrive in those dirty filters, interfering with your appliance’s performance and your home’s hygiene.
A solid maintenance schedule boosts cleaning performance and helps tackle those annoying odours, keeping your kitchen fresh and inviting. Regular inspections and cleanings can prevent residue from building up, which is notorious for attracting unwanted smells and harbouring harmful germs.
By being proactive about maintenance, you can reduce the chances of facing costly repairs later on, extending the life of your dishwasher. Ultimately, incorporating these practices creates a healthier environment by promoting better hygiene, making it essential for every homeowner to prioritise ongoing care for their dishwasher.
Signs of a Dirty Dishwasher Filter
Recognising the signs of a dirty dishwasher filter is vital to keeping your appliance running smoothly and preventing those pesky odours. If you catch a whiff of something foul coming from your dishwasher, it might be a clue that grease and food particles are piling up in the filter.
You should also look for visibly dirty parts or water that isn’t draining properly—if you don’t take care of these, they can lead to bigger issues later.
Identifying When Your Filter Needs Cleaning
Knowing when to clean your dishwasher filter saves hassle and helps prevent more significant issues. You should check the filter if your dishes aren’t coming out clean or if you start noticing any strange smells. Regularly checking once a month can help you catch these problems early and keep your dishwasher running smoothly.
Besides those signs, look for any water drainage issues or grime building up around the filter area. If your dishes are still coming out dirty, even though you’re loading them correctly and using a suitable detergent, that’s a big red flag that it’s time for some maintenance.
Taking just a few minutes to inspect the filter for blockages and rinse it under running water boosts its performance. This simple troubleshooting step highlights how important routine maintenance is, helping you keep your dishwasher in top condition and avoiding those annoying, costly repairs later on.
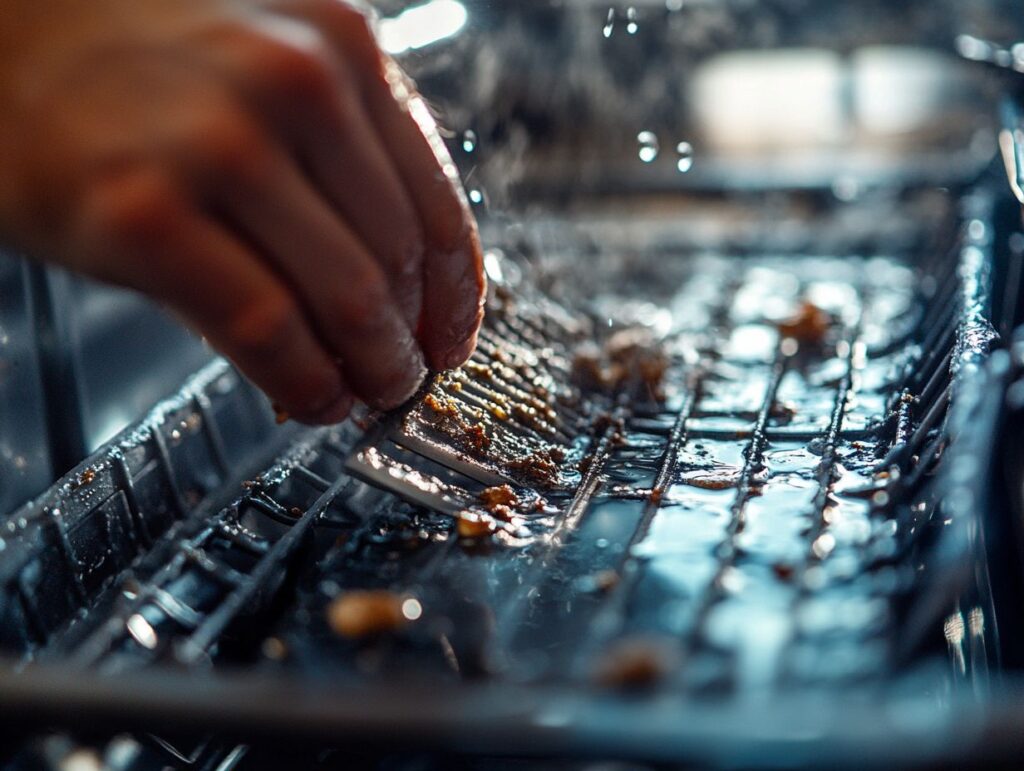
Steps to Clean a Dishwasher Filter
Cleaning your dishwasher filter is easy and can significantly enhance your appliance’s efficiency.
Start by gathering your cleaning tools—consider a scrubbing brush, sponge, and an environmentally friendly cleaning solution. Then, remove the filter from its housing and thoroughly rinse under hot water to eliminate any stubborn food particles and grease.
Once it’s nice and clean, replace the filter, ensuring it’s securely in place for optimal performance.
Gather Necessary Supplies
Before cleaning your dishwasher filter, ensure you have all the supplies you need for a successful cleaning session. You’ll want to grab a sponge, a scrubbing brush, and eco-friendly cleaning products like vinegar and bicarbonate of soda. They’re fantastic for tackling odours and keeping things hygienic.
Don’t forget a microfibre cloth; it’s a lifesaver for wiping down surfaces without leaving any lint behind. A small toothbrush is also a gem for getting into those hard-to-reach spots, ensuring you tackle every nook and cranny.
When choosing eco-friendly cleaning products, opt for biodegradable options whenever you can. They’re gentle on the planet and less harsh on your pottery.
These supplies guarantee a thorough cleaning and help create a healthier home by minimising chemical exposure. So, you can make your cleaning process both sustainable and effective!
Remove and Clean the Filter
To remove and clean your dishwasher filter, turn off the appliance and check your user manual for specific instructions. Carefully detach the filter from its housing and let it soak in hot water and vinegar for about 15 minutes to loosen any stubborn grime.
Then, use a scrubbing brush or sponge to scrub the filter to ensure it’s clean gently.
These simple steps will help keep your dishwasher in excellent condition and extend its lifespan. After scrubbing, rinse the filter under warm running water to remove any leftover debris or cleaning solution. Before putting it back, inspect the filter for any signs of damage.
If everything looks fine, secure the filter back into its housing. Run a short cycle without dishes to clear out any lingering particles in the dishwasher. Regularly cleaning the filter will greatly enhance your dishwasher’s efficiency and help ensure your dishes come out spotless.
Reinstalling the Filter
Once you’ve thoroughly cleaned the filter, it’s time to reinstall it so your dishwasher can run like a dream. Start by placing the filter back into its housing, making sure it fits snugly without any gaps. This quick maintenance step goes a long way in keeping your appliance efficient.
Proper installation is critical—a tiny misalignment can lead to water leaks or debris buildup, disrupting your dishwasher’s performance. Gently push down until you hear that satisfying click, which means the filter is securely locked in place. To be extra sure, give it a little tug to confirm it’s firmly seated.
Attention to these details boosts your dishwasher’s functionality and helps it last longer. You should include regular filter maintenance on your appliance care checklist.
Tips for Preventing Bad Smells in Your Dishwasher
To prevent unpleasant odours in your dishwasher, you must take a proactive cleaning and maintenance approach. Regularly checking and cleaning the filter can help reduce the smells caused by food particles and grease build-up.
Plus, setting a cleaning schedule that includes using a solution specifically designed for dishwashers will help you maintain a fresh and hygienic environment.
Regular Cleaning Schedule
Establishing a regular cleaning schedule is key to keeping your dishwasher odour-free and running smoothly. Aim to check the filter at least once a month, and plan for a deep clean every three to six months, depending on how often you use it. Sticking to this routine boosts your appliance’s performance and helps maintain overall kitchen hygiene.
To make this cleaning schedule fit seamlessly into your daily life, consider setting reminders on your phone or using a calendar to keep track of tasks.
Along with those monthly filter checks, take a moment each week to wipe down the exterior and clean the door seals to prevent build-up. Don’t forget to inspect the spray arms regularly for any blockages—keeping those clear is essential for optimal functionality.
Making these habits part of your routine will keep the dishwasher in top shape, create a more pleasant cooking environment, and extend the appliance’s lifespan.
Other Maintenance Tips
Along with adhering to a regular cleaning schedule, you should remember some other maintenance tips for your dishwasher. For starters, always use the recommended dishwasher detergents. This helps prevent residue build-up and ensures your dishes come out sparkling clean. Don’t forget to check the water inlet and drains occasionally for any blockages—it’s a simple troubleshooting step to keep your dishwasher safe.
Another key practice is to inspect the door seals regularly. A well-maintained gasket can prevent leaks and improve efficiency. You should also run a hot water cycle with vinegar once a month; it’s a great way to dissolve grease and eliminate odour-causing residue. Keeping the spray arms free from debris is crucial, too, as it ensures effective water distribution and enhances your wash performance.
By incorporating these simple yet effective tips into your routine, you can significantly prolong the lifespan of your dishwasher and keep it running smoothly and efficiently.
Are you fed up shelling out cash for commercial cleaning products packed with harsh chemicals? Why not discover the perks of using homemade cleaning solutions that are both eco-friendly and easy on your wallet?
This guide provides simple recipes using common household items, from all-purpose cleaners to laundry detergents. You can learn how to make natural stain removers and bathroom cleaners and get essential tips for safe usage and storage. Embrace a greener approach to cleaning your home and relish the satisfaction of DIY solutions!

Benefits of Using Homemade Cleaning Products
Using homemade cleaning products helps you maintain a clean home and has many benefits for your health and the environment.
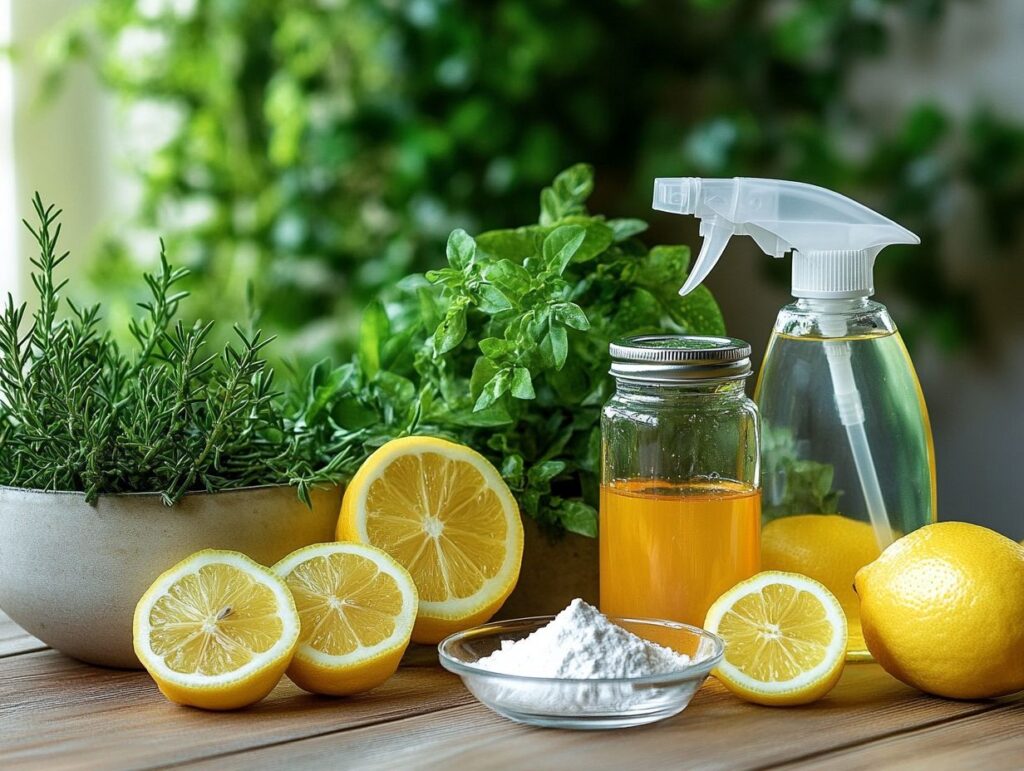
When you choose DIY cleaning solutions, you can avoid the harmful chemicals often lurking in commercial cleaners, creating a safer space for you and your family. Plus, homemade recipes typically feature natural ingredients like vinegar, baking soda, and essential oils.
These ingredients are effective for all cleaning tasks, affordable, and easy to find. This eco-friendly approach can seriously reduce your household’s environmental impact, making it a savvy choice for sustainable cleaning.
Eco-Friendly and Cost-Effective
Homemade cleaning products are eco-friendly and easy on the wallet, making them a smart choice for anyone looking to save a few bucks. Using everyday ingredients like vinegar, baking soda, and lemon juice, you can whip up powerful cleaning solutions that can hold their own against those pricey commercial products. These natural cleaners help reduce your carbon footprint and promote a greener lifestyle since they’re biodegradable and free of harmful chemicals.
When you make your cleaning supplies, you get to control the ingredients, which means they’re safe for your family and pets.
As time passes, the savings from choosing homemade options can add up, making a noticeable difference in your budget while still packing a punch with their cleaning power. And it’s not just about saving money; these alternatives are great for the environment, too. They help cut down on plastic waste from those single-use containers we often find with store-bought cleaners.
Switching to non-toxic and biodegradable ingredients helps reduce environmental pollution and creates a healthier living space, free from irritants and allergens usually lurking in conventional products. By embracing this sustainable approach, you can enjoy the double whammy of financial savings and environmental benefits, paving the way for a more conscientious way of living.
Ingredients for Homemade Cleaning Products
Crafting your homemade cleaning products is a breeze. You only need a few common ingredients that are both effective and safe. Many DIY cleaning solutions use natural ingredients like vinegar, baking soda, and lemon juice, which are great at tackling grime and odours.
You can even add some essential oils for their antibacterial properties and pleasant scents, which will make your cleaning routine a bit more enjoyable.
Once you understand the key components and their functions, you can create various cleaning products that perfectly suit your needs.
Everyday Household Items to Use
You might be surprised by how many common household items can be transformed into effective natural cleaners. Everyday staples like vinegar, baking soda, and lemon juice are versatile ingredients that can tackle a wide range of cleaning tasks, from disinfecting surfaces to removing stains.
Using tools like microfiber cloths and scrub brushes boosts your cleaning efficiency. They make it easier to keep your home clean without using chemical-laden products. These items can help you create a more organized and eco-friendly cleaning routine.
By experimenting with these staples, you can whip up powerful cleaning solutions that freshen up your spaces and protect your family’s health. For example, a simple mixture of vinegar and water can cut through grease on kitchen counters like a champ, while baking soda is a gentle abrasive for scrubbing those stubborn pots and pans. Plus, lemon juice has natural antibacterial properties that make it perfect for sanitizing cutting boards and refreshing your fridge.
Choosing non-toxic surface wipes and reusable cleaning tools can help minimize exposure to harsh chemicals, improve indoor air quality, and create a safer environment for kids and pets.
DIY All-Purpose Cleaner
Creating your all-purpose cleaner is a breeze and a fantastic way to handle all sorts of cleaning jobs around your home. With just a handful of essential ingredients, you can whip up a powerful solution that cuts through grease and grime while keeping your surfaces safe and free from harsh chemicals.
Many popular recipes include vinegar, water, and essential oils, which combine to create a cleaning agent that disinfects, deodorizes, and leaves your space sparkling—no nasty chemicals needed.
This eco-friendly alternative saves you some cash and helps promote a healthier living environment.
Recipe and Instructions
Making your all-purpose cleaner is a breeze with the right recipe and ingredients. Start with a simple mix of one part vinegar and one part water, then toss in your favourite essential oils for extra disinfectant power and a delightful scent. Pour this mixture into a spray bottle for easy use on various surfaces around your home, like kitchen counters, bathroom sinks, and even floors. Remember to shake it well before each use to combine everything nicely.
To boost the effectiveness of your cleaner, think about adding essential oils like tea tree for its natural antibacterial benefits or lemon for that refreshing citrus scent and a little extra grease-cutting action. Feel free to get creative with your cleaner by trying different combinations, such as lavender for a calming vibe or peppermint for a refreshing burst.
It’s a good idea to store your DIY cleaner in a cool, dark place to keep those essential oils in tip-top shape and extend their shelf life. And when you’re ready to use it, do a patch test on delicate surfaces to avoid damage. Oh, and don’t forget to label the bottle for safe storage!
Homemade Bathroom Cleaner
Making your bathroom cleaner is a fantastic way to keep your space clean and safe without relying on harmful chemicals. You can find plenty of effective recipes that use natural disinfectants like vinegar and baking soda, plus some essential oils for their antibacterial benefits and lovely scents.
This eco-friendly method saves you a few bucks and keeps your home safe, especially in sensitive spots like the bathroom. With just a handful of simple ingredients, you can whip up a powerful cleaner that takes on tough stains, soap scum, and pesky odours.
Recipe and Instructions
To whip up your homemade bathroom cleaner:
- Mix 1 cup of vinegar, 1 cup of baking soda, and ten drops of tea tree or lavender essential oil for an extra antibacterial kick.
- Grab a spray bottle, combine the ingredients, and fill the rest with water to create a powerful solution for handling bathroom mess.
- Give it a good shake before use, then spray it on surfaces like sinks, countertops, and toilets to disinfect and deodorize.
- Let it sit for a few minutes to work its magic before wiping it down with a reusable cloth.
This easy-to-make cleaner not only kicks grime and soap scum to the curb but also fights off those unpleasant odours, leaving your bathroom fresh and inviting. To get creative, experiment with different essential oils to boost the scent and add some therapeutic benefits. For example, eucalyptus oil brings a refreshing aroma, while lemon oil packs some natural antibacterial power.
Don’t hesitate to customize the recipe to fit your preferences and the specific needs of your bathroom space. This way, you’ll have a cleaning solution that works for you.
Natural Stain Remover
A natural stain remover is a game-changer for keeping your household textiles looking fresh and clean. Many effective homemade formulas use simple ingredients like baking soda, vinegar, and lemon juice to tackle stubborn stains without harsh chemicals.
These solutions are safe for your family and eco-friendly, which means you’re contributing to a cleaner home and a healthier environment. By switching to natural stain removers, you can protect your fabrics while reducing the environmental impact of conventional cleaning products.
Recipe and Instructions
Mix 1/4 cup of baking soda, 1/4 cup of white vinegar, and one tablespoon of dish soap in a bowl to make a potent natural stain remover. Once you’ve blended everything, apply it directly to the stain and let it sit for at least 30 minutes before rinsing with cold water.
If the stain is particularly stubborn, don’t hesitate to repeat the process until it’s completely gone. This DIY solution is cost-effective and biodegradable, so you can keep your fabrics looking fresh and clean without the nasty chemicals.
This stain remover works well on various stains, from grease and oil to red wine and fruit juice. For those pesky oil stains, gently blot the area first, then apply your mixture to break down the grease. If you’re dealing with ink stains, throwing in a few drops of lemon juice can give your solution extra oomph.
It’s smart to keep this solution handy in your cleaning toolkit for unexpected spills. You can add natural alternatives like essential oils or hydrogen peroxide for a bit more punch, depending on your preferences. Having these ingredients on hand gives you the power to tackle those inevitable messes life throws your way.
Homemade Laundry Detergent
Making homemade laundry detergent is a smart and eco-friendly way to keep your clothes clean and fresh. Using simple, natural ingredients like washing soda, soap, and essential oils, you can whip up a powerful detergent that tackles stains while being gentle on your skin.
This DIY approach saves you some cash and reduces your reliance on chemical-heavy commercial detergents, creating a cleaner and safer environment for your family and pets.
With just a few easy steps, you can turn laundry day into a sustainable practice you feel good about.
Recipe and Instructions
To whip up a simple homemade laundry detergent:
- In a large bowl, combine 1 cup of washing soda, 1 cup of grated bar soap, and 1 cup of borax.
- Mix everything well, then store it in an airtight container.
- Depending on how big and dirty your laundry is, use 1-2 tablespoons of this detergent for each load. This biodegradable cleaning solution will leave your clothes smelling fresh and looking great, all without toxic chemicals.
If you have a high-efficiency (HE) washing machine, remember to adjust the detergent you use. HE machines need less detergent to avoid too many suds.
After you’ve measured your ingredients, blend them thoroughly to avoid any clumps that could interfere with their effectiveness. Once ready, store your homemade mixture in a cool, dry place to keep it effective.
A great way to store it is in a labelled glass jar or a special container that keeps moisture out so everything stays tip-top for your future laundry adventures. Of course, like any other cleaning product, always keep it out of reach of kids and pets.
Tips for Using Homemade Cleaning Products
A few tips can increase the effectiveness of homemade cleaning products and help you create a safe cleaning experience for everyone in your home.
Always test your natural cleaners on small, hidden spots before going all out—this way, you can avoid any potential damage. Plus, using the right cleaning tools like scrub brushes and microfiber cloths can make a big difference in how well you clean.
Remember to store your homemade cleaners in clearly labelled spray bottles. This keeps things organized and safe, especially if you have pets or kids.
Safety Precautions and Storage
Safety should always be your top priority when using homemade cleaning products, even if they’re made from natural ingredients. Label all your containers clearly and keep them out of reach of kids and pets to prevent accidental ingestion or misuse.
It’s a good idea to perform a patch test on surfaces to avoid unwanted reactions. Also, remember to ventilate your cleaning space to improve air quality, especially when working with essential oils or vinegar-based solutions. This awareness keeps your household safe and enhances your overall cleaning experience.
Taking the time to learn about each ingredient is key. Knowing which natural substances react poorly helps create a much safer cleaning environment. It’s also wise to keep a first-aid kit nearby for accidental exposure because immediate access can be crucial.
Always wash your hands thoroughly after using homemade products, even if they seem harmless.
By adopting these simple yet effective measures, you can cultivate a proactive approach to household safety. Cleaning should be a task that promotes hygiene and secures the well-being of everyone in your home.
Hello, boys and girls! My name is Kate Rosales, I am the proud mother of a boy (9) and a girl (6), and I live in beautiful, fabulous Greenwich, London. Keep in mind that this is my first foray into blog posting, so if you find my ramblings chaotic, let’s agree it is because of inexperience.
I was born and raised in London, but my parents were immigrants from war-torn El Salvador. They arrived in the UK in the mid-80s and settled in Lambeth, finding a vibrant and welcoming Latino community. My mother was already pregnant with my older brother and arrived on the scene four years later. We were (and still are) a very close-knit family, and my parents are still fiercely proud of their Salvadorian heritage, particularly Mom, which brings me closer to the topic of this whole blog.
I must have been twelve or thirteen when I realised my family was a bit different from those of my best friends and classmates, most of them English. Not that I was discriminated against in any way – quite the contrary. But my parents’ values seemed slightly different from what I observed when visiting my best friends’ homes.
The most apparent difference was my Mom’s lifestyle. She felt most comfortable and at ease while being at home. The space within our small Lambeth apartment was her undisputed kingdom, and no one – not even Dad, could question her authority on all things domestic. She relished being a housewife – cooking, cleaning, growing flowers, and thinking of creative ways to make our home more beautiful and comfortable. My best friends’ moms almost unanimously spoke of their house chores as burdens and nuisances. They had their careers and hobbies, book clubs and even charities, and cleaning and cooking were a waste of time. There could not have been a more stark contrast in worldview.
I would have to disappoint you if you expect this contrast to have turned into some inner existential conflict. I loved and respected my Mom so much, and I was incredibly proud that she felt comfortable in her own skin. Moreover, I thoroughly inherited her passion for home order and anything related to it. While my teenage friends were coming up with cunning and creative plans to avoid cleaning their rooms or doing any chores, I was more than happy to help Mom clean the windows or dust the living room.
Shortly after graduating from high school, I finally had my epiphany. Why choose between a career (what my father insisted on) and being the perfect housewife (as my Mom hoped) when I could combine them? If 90% of my friends were a sample of how the general population felt about home cleaning, thousands of people would be willing to pay someone else to do it. All I had to do was get the proper qualifications, survey the job opportunities, and pick the best option.
The first part of the plan turned out to be surprisingly easy. I signed up for a few professional cleaning courses and crushed them. Here is a funny story: a window cleaning instructor at one of the biggest London contractors thought I was a spy sent by one of their competitors to steal their course (I promise the write a separate blog post on that!). There was nothing I could do or say to convince her otherwise – so I had to sign up for another course.
The second part of the plan was a bit more tricky. I had to choose between working for a big company or being self-employed. Maybe it was the fact that I was in my early twenties or some hereditary rebellious streak in my character – but I chose the latter. I planned to cover as much of the South Bank as possible – Lambeth, Southwark, Bermondsey, and Rotherhithe, probably as far as Deptford and Greenwich. I knew it would be a struggle at first, but I wanted to give it a try.
Gosh, was I ever wrong! I had hoped to have enough work to make ends meet so that in a year or two, I could build a network of regular customers and really get it going. Instead, when I put my ad on a local forum board, my phone started ringing within three days. It wouldn’t stop for the next two years. Had I struck a gold mine? Was it pure luck?
To this day, I have no answer. Some of my customers admitted they felt more comfortable with a self-employed cleaner who charged them less than the big contractors who always paid additional fees. Others liked the fact that I am local and represent the community. Still more were customers of Latin American descent, proud that one of their own was doing well in the London jungle. Either way, I was flooded with calls and booking requests, so I had to roll up my sleeves and go head-first into my adventure.
I confess the next eighteen months are something of a blur. I was working between 55 and 70 hours per week, constantly rushing between appointments – in a nutshell, having the blast of my life. Then, something completely unexpected happened. I was helping my brother with organising his birthday party when one of his colleagues stopped by. My brother is a Math teacher in a Greenwich primary school, and his colleague was teaching chemistry. He had just returned from a UN teaching stint in Nepal (Come on! Does it get any more perfect than that?!) and was re-entering everyday London life.
I never had a chance… That handsome devil stole my heart in a minute with his clumsy charm and unapologetic intelligence. We were married six months later, and then my baby monkeys came into this world.
In between, I pushed the pause button on my cleaning career.
But now that both my kids have started school, I am slowly getting back into business. Hence this blog is “my third wheel of getting back into cleaning”. And I invite you to join me on my return!